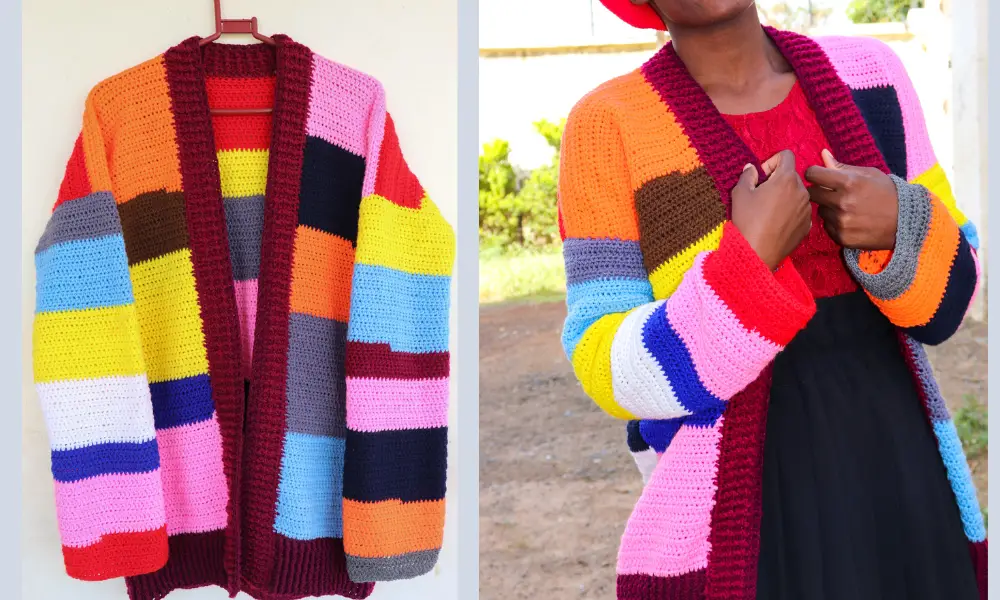
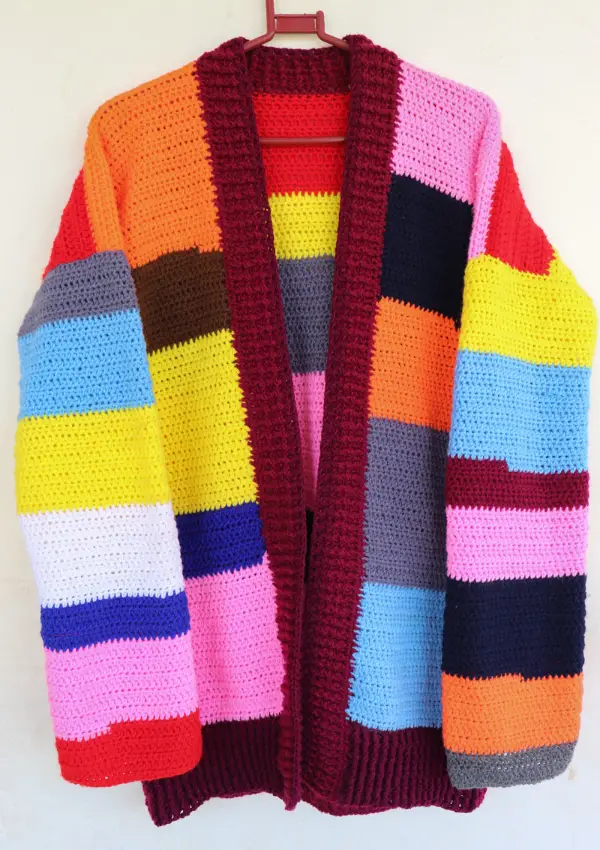
This crochet scrap yarn cardigan is a great way to use scrap yarns without necessarily having to buy new yarn. I really enjoy stash busting projects because they are economical and every piece is unique. You can never have two similar projects even with the same pattern.
LATEST VIDEOS
Depending on the number of colors you want to use for the cardigan and the quantity of yarn you have, you can definitely create your personalized cardigan. You can choose to go bold with colors like i did or pic a specific hue and tone.
You might also like:
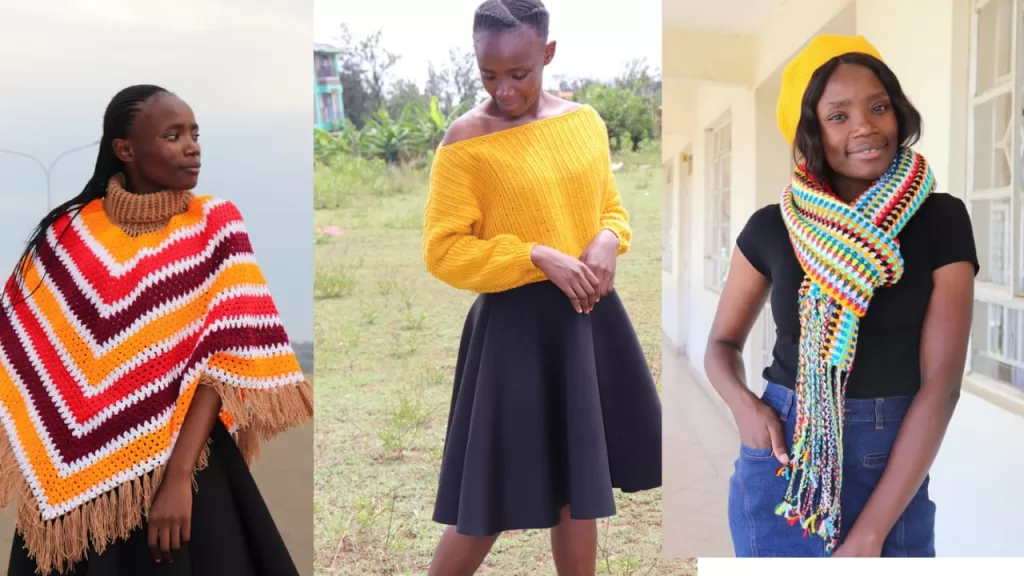
- Crochet EASY granny stitch poncho. 2. Crochet Off the shoulder Sweater. 3. Easy Crochet Moss Stitch Scarf
This post may contain affiliate links or referrals. I make a small commission from purchases made through the links at no extra cost to you. You can read our privacy policy for more information.
About Yarn.
In this project, i used what was available in the quantity that i needed and that was fine yarn. To achieve my gauge or the gauge of a light 3 yarn, I doubled the strands. You can opt to double the strands of fine yarn or just use light or sport yarn available.
save this post on your Pinterest board here, so you don’t loose it.
THE PATTERN IS WRITTEN IN US TERMINOLOGY.
Skill Level: Easy
Yarn Weight: Sport/ 2 strands of fine yarn
Notes.
- Since this is a scrap yarn project, there is no color planning, just change color after a random number of rows. If you’d like to coordinate and plan the colors, you can pick a specific number of rows for each color.
- The pattern is made in sizes xs(s, m, l, xl, xxl). see finished measurements below for exact measurements in inches.
- To change color, use the magic knot in attaching new color to avoid weaving multiple ends when done.
- The cardigan is made in 5 rectangle panels that are joined together at the end. There is no shaping needed.
- Ch2 at the beginning of each row does not count as a stitch.
- The main color is used for bottom ribbing and neck band.
Materials Needed.
- 4.5mm crochet hook
- Dk/Light weight yarn, or doubled fine yarn.
- Tape measure
- Yarn needle
- Scissors
Stitch Abbreviations
Ch : chain Ea: each
Sc: Half double crochet Mc: main color
Sk: skip Pat: pattern
Fpdc : front post double crochet Rep: repeat
Bpdc : back post double crochet
St(s) : stitch(es)
Gauge
With 4.5 mm hook, 6 rows of 8hdc sts measures 2”
Finished Size Measurements:
fitted bust: 28(32. 36, 40, 44, 48)
Finished bust: 36(40,44,48,52,56)
Full length: 26″. this is for all sizes. if you want a longer or shorter, add or reduce the number of rows, ending on an even number of row.
SCHEMATICS

Crochet scrap yarn cardigan pattern.
Front Panel.(Make 2)
Bottom ribbing.
With 4.5 mm hook and Main Color,
Chain 30(34,38,42,46,50)
Row 1.
Sk 2 chains, dc in ea chain to end of row. 28(32,36,40,44,48) Turn
Row 2.
Ch 2, dc first st,* fpdc, bpdc* rep to last st, dc last st. Turn
Repeat row 2 until bottom ribbing measures 4”.
Attach new yarn at the last st of the last row of ribbing.
Main body
Row 1.
Chain 2(doesn’t count as a st), hdc in ea st to end of row.28(32,36,40,44,48) turn
With the same color, repeat row 1 until the next color change.
To change color, attach new yarn with magic knot then continue with pattern, until you have 72 rows. Ch1 and cut yarn.
Back Panel.
Bottom ribbing.
With 4.5 mm hook and Main Color,
Chain 74(82,90,98106,114)
Row 1.
Sk 2 chains, dc in ea chain to end of row. 72(80,88,96,104,112) Turn
Row 2.
Ch 2, dc first st,* fpdc, bpdc* rep to last st, dc last st. Turn
Repeat row 2 until bottom ribbing measures 4”.
Attach new yarn at the last st of the last row of ribbing.
Main body
Row 1.
Chain 2(doesn’t count as a st), hdc in ea st to end of row. 72(80,88,96,104,112). Turn
With the same color, repeat row 1 until the next color change.
To change color, attach new yarn with magic knot then continue with pattern, until you have 72 rows. Ch1 and cut yarn.
Sleeves.(Make 2)
With 4.5 mm hook any Color,
Chain 50(54,54,58,58,62)
Row 1.
Sk 2 chains, hdc in ea chain to end of row. 48(52,52,56,56,60)
Row 2.
Chain 2, hdc in the first st and ea st to end of row. Turn.
Repeat row 2 until you have 58 rows for XS to M, and 62 rows for L to 2XL.
Joining the Panels.
Using either mattress stitch join or the whip stitch, join the shoulder seams first, then attach the sleeves to the main body of the cardigan.
Next, join the sleeve panels and then proceed to side seams.
Neck band.
Using the main color, attach yarn in the bottom ribbing(the first dc) with a standing sc, then sc around the same st, 2sc around each of the next dc sts until the hdc rows, *sc around the hdc row, 2sc around the next* rep pattern to the last hdc row.
On the back sts, sc in ea st.
On the opposite rows, *sc around the hdc row, 2sc around the next* repeat to bottom ribbing.
2sc around ea dc stitch to end of the neck band.
You should have 272 stitches. don’t be worried if yours do not add up to 272, just make sure it is and even number of stitches.
Next row.
Ch2 {this doesn’t count as a st}, dc in ea stitch to end of row.
Next row.
Ch2, dc in first st, *fpdc in the next st, bpdc next st* repeat to last st, dc in the last st.
Repeat the previous row pattern until neck band measures 2”. ch1, cut yarn and weave in all the ends.
If you are a more visual learner, you can follow along with the YouTube tutorial.
Happy crocheting and remember to tag us on your finished pieces on Instagram. We love to see them.


Leave a Reply