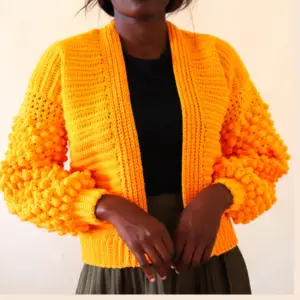
Crochet patchwork cardigan took the internet by storm these past two years and even two years later, the patchwork still looks so chic and stylish. I believe this is one style that will be in fashion several years to come. Every now and then, different version spring up and I’m here to take it all.
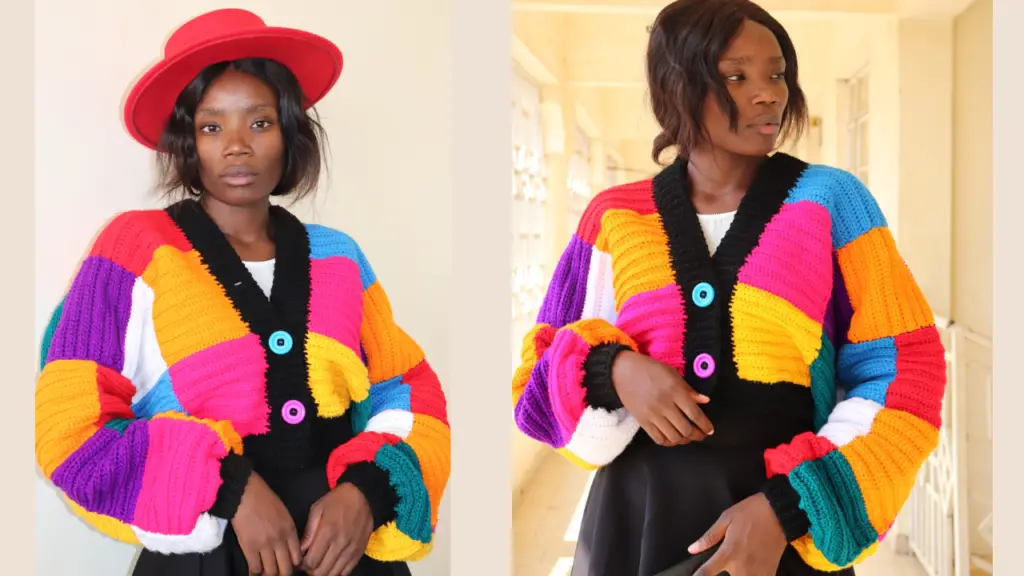
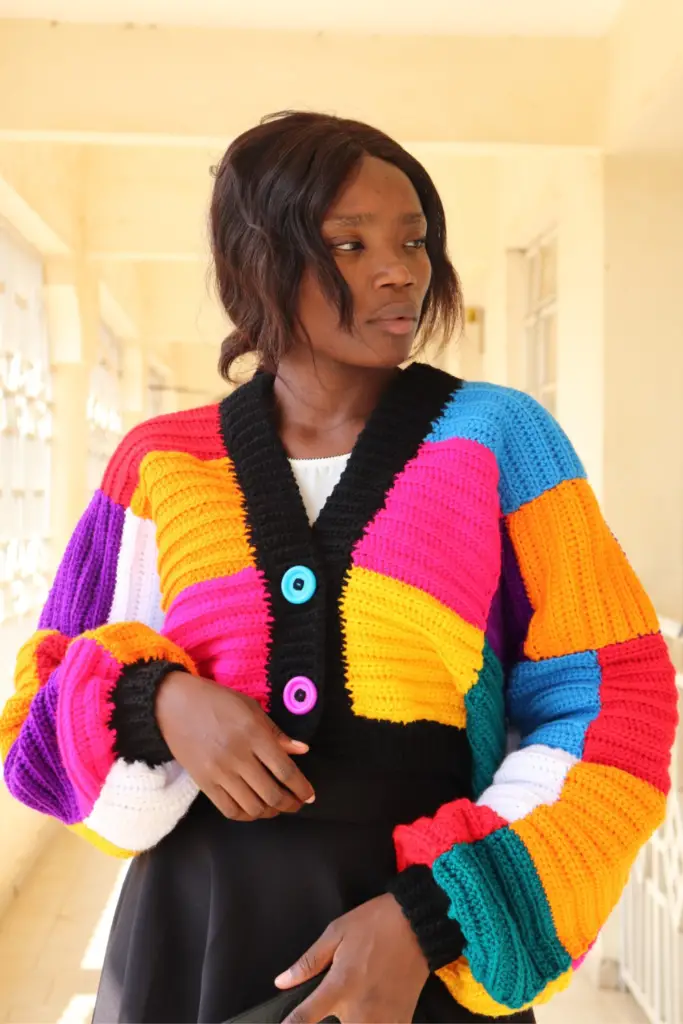
A friend reached out and requested for a patchwork cardigan but had her specifications. She wanted the cardigan oversized and puffy. This was something new entirely and I couldn’t wait to start on it.
I therefore decided to document it and share it with you.
So Lets get started.
- THE PATTERN IS WRITTEN IN US TERMINOLOGY.
SKILL LEVEL: Easy YARN WEIGHT: Worsted / category 4
Sizes
XS to 4XL
Materials
- Worsted yarn / category 4. You will need Approximately 85g(100g,130g,155g) of each color of yarn and 9 colors for this cardigan.
- 4.0mm & 4.5 mm hook, or any to obtain gauge.
- Pair of scissors
- Tape measure(for sizing)
- Yarn needle
- 2 Buttons {optional}
Buy the ad-free, large printable pdf version on my shops below.
Gauge
With 4.5 mm hook & working in double crochet,
17sts & 9 rows measures 4”x4”(10cm x 10cm)
Pin this Here so you can work on it anytime.
Abbreviations/Stitches Used
Hdc – half double crochet Blo – back loop only
Pcs – pieces Slst – slip stitch(es)
Sk – skip Ea – each
Sc2tog – single crochet 2 together WS – wrong side
Sc3tog – single crochet 3 together RS – right side.
Finished Size Measurements.
Sizing is given is xs&s(m&l, xl&2xl, 3xl&4xl)
Measurements in inches
To fit bust: 32”(40”, 48”, 56”)
Finished bust: 49”(56”, 63”, 70”)
Cardigan length {inc ribbing}: 19.5”(19.5”, 22.5”, 22.5”)
Back width: 24.5”(28”, 31.5”, 35”)
Notes.
- The sizing guide follow size xs&s(m&l, xl&2xl, 3xl&4xl)Where “Chain 22(25,28,31) means Ch22 for xs&s, chain 25 for m&l, chain 28 for xl&2xl, chain 31 for 3xl&4xl.” If there is only one number, it applies to all sizes.
- Some parts of the pattern is written in shorthand. I.e, {hdc, 2hdc} mean hdc in one stitch then place 2 hdc in the next stitch, whereas {hdc 10} means work 1 hdc in the next 10 sts.
- Repeat instructions after the asterisk (*) as stated in the pattern.
- It is important to maintain gauge throughout the pattern.
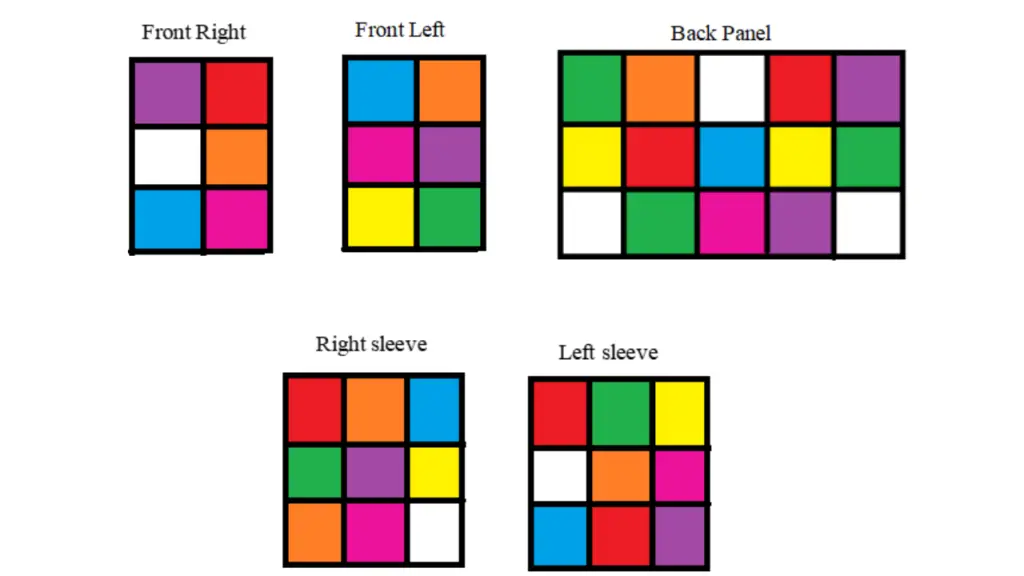
- This cardigan is worked in 45 pieces, which are joined to form 5 major panels; 2 front panels, 1back and 2 sleeves panels which are then sewn together at the end.
- Ch 1or ch 2 at the start of new row doesn’t count as a stitch, unless stated in pattern.
- Number stated at end of every row is the count of stitches.
- The pattern offers 14” to 20” positive ease.
- Scroll to the last page for the video tutorial.
Stitch Explanation.
Whip stitch join: insert needle through stitch on one panel, then thread the needle through the stitch on the opposite panel then draw the yarn to close the stitches. Do this until the sides are joined as stated in pattern.
Single crochet back loop only {scblo}: insert hook in the back loop of the next stitch, yarn over and pull through the stitch (2 loops on hook), yarn over and pull through the 2 loops.
Half double crochet back loop only {hdcblo}: yarn over, insert hook in the back loop of the next stitch, yarn over and pull through the stitch (3 loops on hook), yarn over and pull through all the 3 loops.
Half double crochet {hdc}: yarn over, insert hook in the next stitch, yarn over and pull through the stitch (3 loops on hook), yarn over and pull through all the 3 loops.
Single crochet 3 together {sc3tog}:* insert hook in the next stitch, yarn over and pull through * repeat this 2 times, yarn over and pull through all 4 loops.
Single crochet 2 together {sc2tog}:* insert hook in the next stitch, yarn over and pull through * repeat this once more, yarn over and pull through all 3 loops.
Schematics

More Cardigan Patterns that might interest you.

- Crochet Bobble Sleeves Cardigan No.1
- Crochet Granny Square Cardigan. Fun & Easy Pattern.
- Crochet Drape Cardigan
Patchwork Cardigan Pattern.
Individual patch.
Chain 22(25, 28, 31)
Row 1.
Sk 1 ch, hdc back bump of every chain to the end. 21(24,27,30)
Row 2.
Ch1, hdc in the first st, hdc blo in ea st to the last st, hdc last st.
Rep row 2 until you have :
14 rows for xs to l.
18 rows for xl to 4xl.
Ch1& fasten off.
Make 45 individual patches then weave all the ends.

Assembly.
Following the color arrangement below, join the front panel seams, back panels and sleeves using the whip stitch.
Joining shoulder seams.
- With WS facing you. Lay the shoulder seam of front panels to the back panel and whip stitch together,
- Still on the WS, mark the middle st on the sleeve panels, then connect it to the shoulder seam. Whip stitch the sleeve to the cardigan.
- Fold the cardigan at the shoulder seam and whip stitch the side panels from the bottom of cardigan to the armhole, then to end of sleeves. Do this for both panels.
Turn to RS.
Bottom Ribbing.
Attach yarn at one end of the front panels, ch 9(9,13,13),
Row 1.
Slst back bump of ea ch to end, slst nxt 2 sts of the bottom row of cardigan, 8(8,12,12) turn.
Row 2.
Slst blo ea st to end. 8(8,12,12) turn.
Row 3.
Ch1, slst blo ea st to end, slst nxt 2 sts of the bottom row, 8(8,12,12), turn.
Rep row 2&3 to end, ending on row 2 pattern.
Ch1& fasten off.
Neck Band ribbing.
Attach yarn at the last st of bottom ribbing,
- Sc in ea of the ribbing sts, {sc,2sc}around the hdc rows until you reach the back panel,
- sc in ea st of the back panel, {sc,2sc}around the hdc rows of the opposite panel,
- Sc in ea of the ribbing sts.
- Turn.
- Mark slots for button hole.
Row 2,
Ch 9(9,13,13), Sk first ch, sc in the back bump of ea ch to end, slst nxt 2 sts of the side panel, 8(8,12,12) turn.
Do not work in the slst(s)
Row 3.
Sc blo ea st to end of row. 8(8,12,12)Turn
Row 4.
Ch1, Sc blo to end, slst nxt 2 sts of the side panel,. 8(8,12,12)Turn
Rep row 3&4 until you reach the marker for button hole.
[After slst in the side panel sts, turn, sc blo nxt 2 sts, ch4, sk 4sts, sc blo last 2 sts, turn.]
Next row
Ch1, Sc blo first 2 sts, sc in ea of the 4 ch, sc blo last 2 sts, }, slst nxt 2 sts of the side panel,. 8(8,12,12)Turn
- Cont with pattern repeat (row3&4) to the next button hole, repeat pattern for button hole,
- After working all the button holes, cont with pattern to end of the neckband ribbing.
Cuff .
Attach yarn at any stitch next to the seam line that runs straight to the armhole.
Round 1.
Ch1, *Sc2tog, sc3tog, repeat from * to end of round. 25(29, 32,36) sts.
Round 2.
Ch 1, sc in ea st to end of round.
Band Ribbing.
Ch 6(6,8,8)
Row 1.
Sk 1 ch, sc in the back bump of ea ch to the end, slst nxt 2 sts of round 2. 5(5,7,7)sts, Turn.
Row 2.
Sk the slst(s) ,sc blo in ea of the sts. 5(5,7,7)sts, Turn.
Row 3.
Ch1, sc first st, sc blo in ea st to end, slst nxt 2 sts of round 2. 5(5,7,7)sts, Turn.
Repeat row 2&3 to the end of the cuff.
Repeat this for the other sleeve.
When you’re done, weave in all the loose ends.




Leave a Reply