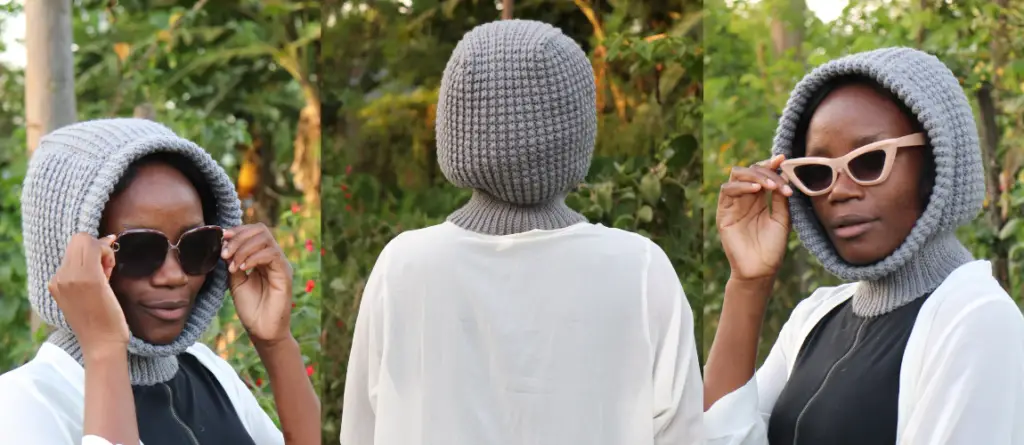
If your looking for an easy, fun and stylish crochet balaclava, then you are in the right place.
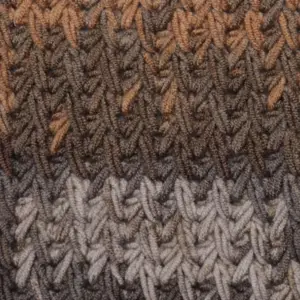
This crochet balaclava pattern comes in 4 different sizes. A kids size, tween / xs size, adult medium and an adult large size. The pattern uses the rail rib stitch pattern which is basically alternating hdc blo and slst blo.
This crochet balaclava is one of those 1 ball of yarn projects that you do not want to miss. I enjoyed making it and I hope you will too.
This post may contain affiliate links or referrals.
THE PATTERN IS WRITTEN IN US TERMINOLOGY.
Skill Level:
Advanced Beginner
Materials
Yarn
Worsted weight yarn / size 4.
The yarn used in pattern is saver by ice yarns {100% dralon acrylic, 200g/330 m}
You will need approximately
290 meters for kids size
306 meters for tween/xs
320 meters for Adult medium
338 meters for adult extra large.
You can however use any size 4 yarn you have around, just ensure your gauge is correct.
Hooks
- 4.5 mm for making the main body
- 3.5 mm for making the front opening ribbing.
Notions
Ø Pair of scissors
Ø Yarn needle
Sizes & Measurements.
| Size | Head Circumference | Finished length | Finished Width |
| Kids(4 to 12 yrs) | 18” – 20” | 11.5” | 8” |
| Tween \ xs | 20” – 22” | 12.75” | 9.25” |
| Adult Medium | 23” | 14.25” | 10.5” |
| Adult large | 24” | 15.25” | 11.25” |
Gauge
20 sts and 18 rows measure 4”x4” when working the { hdc blo, slst blo } ribbing on a 4.5 mm hook.
Pattern for gauge:
chain 26,
- Row 1: skip 1 ch, *slst in next ch,hdc next ch, * rep to last ch, sc in the last. Turn
- Row 2: ch 1, *slst blo in first st, hdc blo in next st* rep to last st, sc blo in the last st.
Repeat row 2 until you have 20 or more rows. Then measure your gauge.
Abbreviations/Stitches Used
st = stitch
Hdc = half double crochet
Slst-2-tog = slip stitch 2 together
Slst = slip stitch
Sc = single crochet
Blo = back loop only
Ch = chain
Rep = repeat
Rem = remain.
Notes.
- The pattern is available in 4 different sizes, kids, tween/xs, adult medium and adult large.
- Ch 1 at the beginning of a new row does not count as a stitch.
- The hoodie is made by first working on one side,
- then you proceed to the back and crown, then you decrease while making the opposite side.
- After that, you will add more rows for neck ribbing, close it up and
- finish with the front ribbing.
- Repeat instructions between asterisk (**) as stated in the following statement.
- All rows are worked in the back loop only {blo}
- It is important to maintain gauge throughout the pattern.
- Images used in the pattern are for adult woman(medium)
- The first row is worked in the back bumps of the foundation chain.
- Number stated at the end of a row, are the count of stitches in that row.
- The sizing is given in kids (tween/xs, medium, large). For example, Chain 49(55, 61, 65) means, ch 49 for kids, ch 55 for tween/xs, ch 61 for medium, ch 65 for large.
- 2. Some parts of the pattern are written in shorthand. I.e, {hdc blo, slst blo} mean hdc blo in one stitch then slst blo in the next stitch, whereas {slst blo 20} means work 1 slst blo in the next 20 sts.
Rail Rib crochet balaclava Pattern.
Left Side
With 4.5 mm hook, Chain 49 (55, 61, 65)
Working in the back bumps of the foundation chains,
Row 1.
Skip first chain, slst in next 14(18,20,20) chains. Hdc in the next ch, *slst in next ch, hdc in next ch,*
Rep from * until 1 ch rem, sc in the last ch. Turn.
From now on, work in the back loop only for the rest of the pattern.
Row 2.
Ch 1, *slst blo in the first st, hdc blo next st* rep the pat within *-* until you reach the last hdc, hdc blo in that st, slst blo in last 14(18,20,20) sts, Turn.
Row 3.
Ch 1, slst in the first 14(18,20,20) sts.
*Hdc blo in next st, slst blo in next st* rep the pat within *-* until one st rem, sc blo in the last st. Turn
Row 4.
Ch 1, *slst blo in the first st, hdc blo next st* rep the pat within *-* until you reach the last hdc, hdc blo in that st, slst blo in last 14(18,20,20) sts, Turn.
Repeat rows 3 & 4 until you have 24(26,30,32) rows

Back & crown
Row 25(27,31,33)
Ch 1, slst in the first 14(18,20,20) sts.
*Hdc blo in next st, slst blo in next st* rep the pat within *-* until the end of row,
continue to the top of previous rows: sc at the end of each row, 24(26,30,32) sc sts. Turn.

Row 26(28,32,34)
Ch 1, slst blo in the first st, *hdc blo next st, slst blo in the next st* rep the pat within *-* until you reach the last hdc, hdc blo in that st, slst blo in last 14(18,20,20) sts, Turn.
Row 27(29,33,35)
Ch 1, slst in the first 14(18,20,20) sts.
*Hdc blo in next st, slst blo in next st* rep the pat within *-* until one st rem, sc blo in the last st. Turn
Repeat the previous 2 rows until you have 40(46, 52, 56) rows
Right Side decreases.
Mark the 24(26,30,32) st from the start of previous row.(the crown area)

Row 41(47,53,57)
Ch 1, slst in the first 14(18,20,20) sts.
*Hdc blo in next st, slst blo in next st* rep the pat within *-* until you reach the st with marker
Slst-2-tog [in the st with marker & st after marker]. Turn

Row 42(48, 54, 58)
Skip the slst-2-tog, *slst blo in next st, hdc blo in next st,* rep the pat within *-* until you reach the last slip stitches, slst blo in each st to end of row. Turn.
Row 43(49,55,59)
Ch 1, slst in each slst, until you reach the first hdc st,
*Hdc blo in next st, slst blo in next st* rep the pat within *-* to the end of row,
Slst-2-tog [in the next 2 sts]. Turn
Row 44(50, 56, 60)
Skip the slst-2-tog, *slst blo in next st, hdc blo in next st,* rep the pat within *-* until you reach the last slip stitches, slst blo in each st to end of row. Turn.
Repeat the previous 2 rows, until you finish all the decreases.
You should have
- 62 rows for kids size
- 72 rows for tween/xs
- 82 rows for medium
- 88 rows for large

Adding the neck ribbing rows.
Row 1.
Ch 1, slst blo in each slip st. don’t work in the next hdc st.
Row 2.
Ch 1, slst blo in each slip st to end of row.
** Rep row 2 until you have 16,(18,20,22) rows of the added ribbing.
OR until the ribbing can wrap comfortably around you neck.

Join the last row to the first row with mattress stitch join.
Adding the face ribbing.
Change to a 3.75mm / 3.5mm hook.
Attach yarn in the first slst of the added neck ribbing rows, sc in each of the slst rows,
sc blo in the first side sts,
Sc blo in the crown or top row sts,
Sc blo in the other side sts.
You should have 102,(110, 122, 134) sc sts, join to first st with a slst.
Row 1.
Ch 8(10,12,12), Turn

Sc in the back bump of the 2nd ch and every other chain, slst in the next 2 sts. Turn
Row 2.
Sk the slst, sc blo on each sc st. Turn
Row 3.
Ch 1, sc blo on each sc st, slst in the next 2 sts . Turn.

- Repeat row 2 & 3 all the way around.
- Slst in the last st,
- ch 1 and cut yarn leaving about twice the circumference of the opening.
Join the last row to the first row with mattress stitch join.
Fold the ribbing inside your work and mark several points to make it easy when sewing it in.

Whip stitch the ribbing all the way around until you finish it. Cut yarn and weave in all ends.
I hope you enjoyed making the balaclava. please remember to tag me on your work below.
Instagram : https://www.instagram.com/dreamcrochets/
Facebook group : https://bit.ly/3XLcqNi
Pinterest https://www.pinterest.com/Dreamcrochets
Youtube http://bit.ly/3lJy07v
Facebook Page https://www.facebook.com/dreamcrochets
Want more stitch Patterns? Find them Here.
Buy me coffee to support these free content.
Remember, sharing is caring.


Leave a Reply