This post may contain affiliate links. I earn a small commission on qualifying purchases made through the links without any extra cost to you.
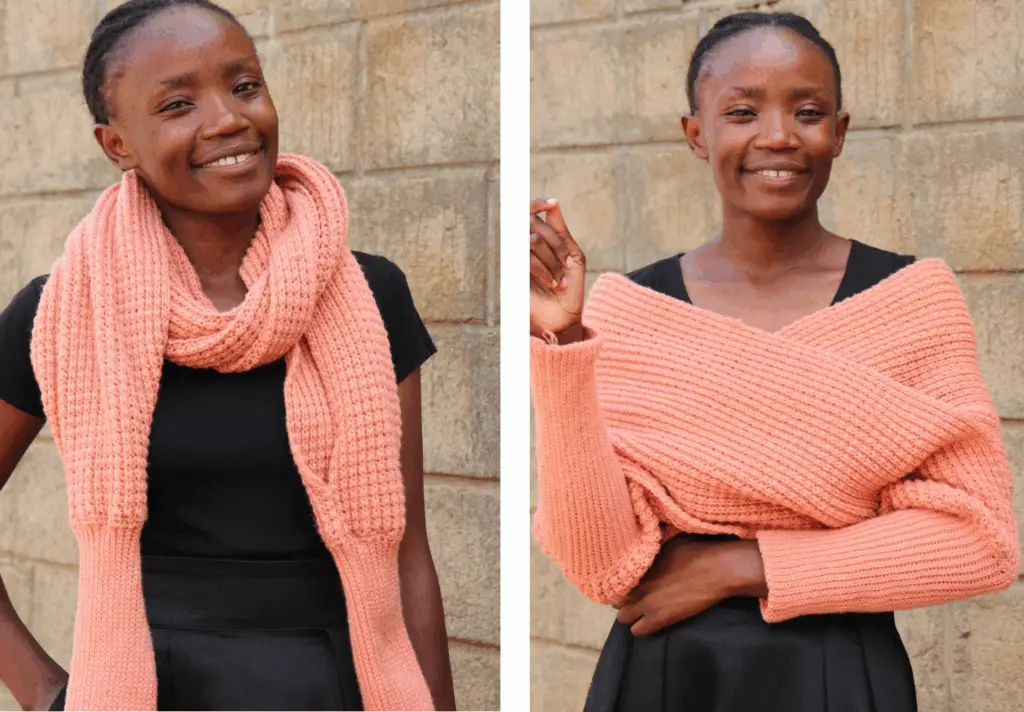
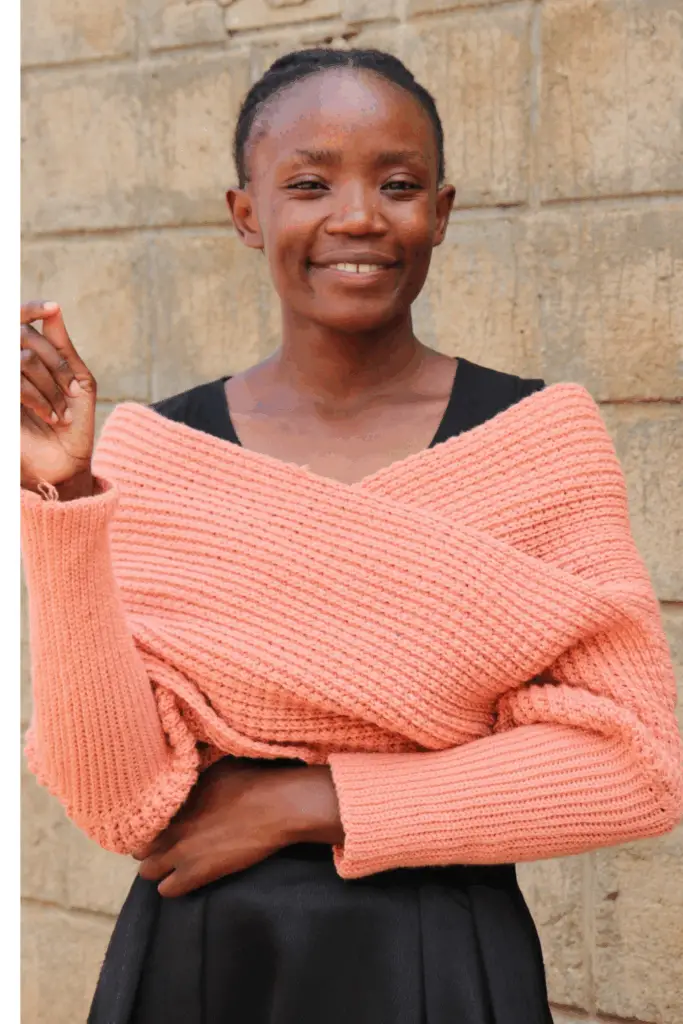
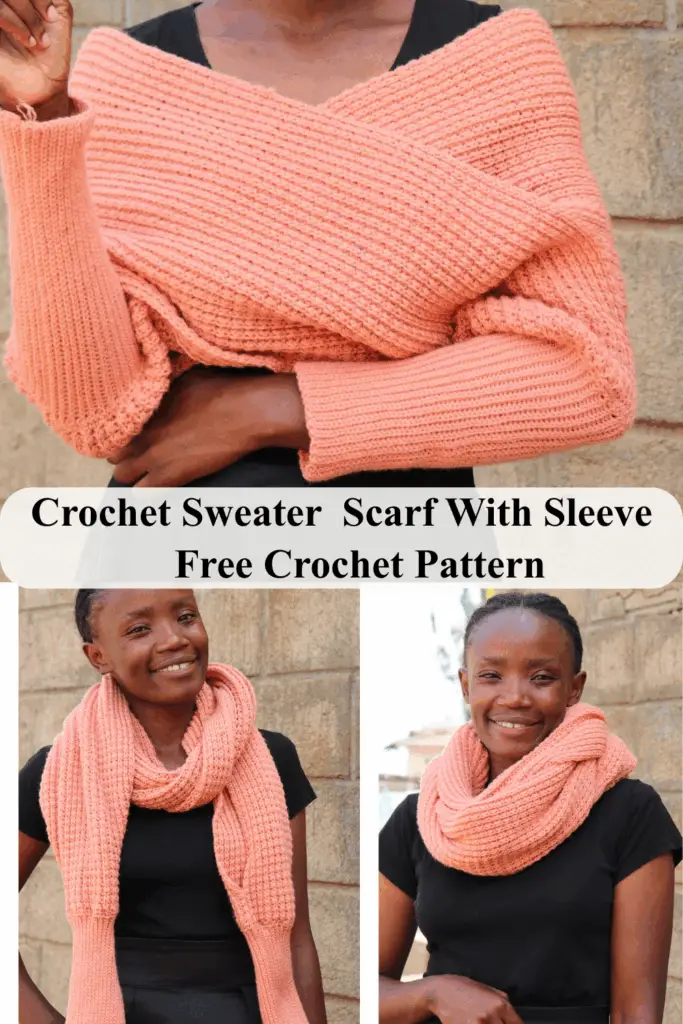
If you’ve ever wished your scarf could also be a sweater, or that your cozy layer could magically transform depending on the weather, this crochet sweater scarf with sleeves is about to become your new favorite project. It’s snuggly, stylish, and surprisingly simple to make. Even better? It can be worn three different ways: as a sweater scarf, a traditional long scarf, or a chunky cowl.
Whether you’re a beginner looking for a fun challenge or an experienced crocheter wanting a versatile wardrobe piece, this project is the perfect mix of comfort and creativity.
Why You’ll Love This Sweater Scarf Design
- It uses beginner-friendly stitches – This Sweater scarf uses only the slip stitch, single crochet and half double crochet. This makes it beginner friendly. It also has basic shaping that can be done by anybody.
- Versatile styling – wear it as a cozy sweater wrap, loop it into a cowl, or let it drape like a classic scarf.
- Custom fit – You can easily adjust the length and width according to your liking.
- Perfect for gift making – If you have family or friends that love receiving crochet gifts from you, be rest assured they will all love this. It is stylish, practical, and unique, making it a wardrobe staple.
Construction
This crochet sweater scarf with sleeves is designed as a seamless, one-piece project, making it beginner-friendly while still looking beautifully structured. The entire garment is worked in a simple flow that keeps the shape clean and the finishing minimal. Here’s how the construction works from start to finish:
1. Crochet the Main Rectangle (Body of the Sweater Scarf)
The project begins with a long, cozy rectangle that forms the main wrap around the body. This section determines the overall fit and drape, so you can easily customize the length for a more drapey look or the width for extra coverage. Worked using the pixel stitch, the rectangle becomes the foundation for the sleeves and the body.
2. Add Sleeve Ribbing Using a Join-As-You-Go Method
Instead of sewing ribbed cuffs on later, the sleeve ribbing is created directly onto the short edges of the rectangle. This join-as-you-go method ensures a clean and professional-looking edge, extra stretch and comfort around the wrists, lastly no separate pieces to attach later. The ribbing is crocheted sideways, joining each row onto the body edge as you go. This gives the sleeves a soft, flexible fit and makes the construction feel intuitive and smooth.
3. Fold and Seam the Sleeves Into Shape
Once both ribbed cuffs are complete, each sleeve section is folded in half lengthwise, aligning the ribbing.
A simple seam using the mattress joining method is worked along the sleeve edge to close it.
The rest of the rectangle remains open and drapey, allowing the piece to be worn as a Sweater scarf, cowl, traditional scarf and a versatile wrap.
Styling Ideas for your crochet sweater scarf.
1. As a Sweater Scarf
Slip your arms through the sleeves and wear it across your shoulders.
Perfect for:
- Working in a chilly office
- Coffee shop afternoons
- Cozy evenings at home
2. As a Regular Scarf
Drape it around your neck with the sleeves hanging down—or wrap twice for more warmth.
This style shows off texture beautifully and adds a handmade touch to any outfit.
3. As a Chunky Cowl
Loop the scarf around your neck and tuck the sleeves underneath.
Instant volume. Instant warmth. Instant style.
Skill Level:
Easy +
Materials.
- Yarn – Dk / Light weight. I used classic dk by ice yarns, which is 100% acrylic, 100g {285m} per ball.
- You can substitute this with any light weight yarn. Just get the gauge correct.
- Yarn needed: 1090, (1112, 1145) meters
- You can substitute this with any light weight yarn. Just get the gauge correct.
- 4.0 mm crochet hook.
- Pair of scissors
- Yarn needle
- Tape Measure
Gauge:
Working in the pattern stitch and with a 4.0 mm hook, approximately 21 rows of 19 stitches measure 4” x 4”
Measurements (in Inches)
Sizes: xs&s ( m&l, xl&2xl, 3xl&4xl)
To fit bust: 30-34 (36-40, 42-48, 50- 56) inches
Finished length before blocking: 82 (85.5, 88.5, 92) inches
Sweater Width before blocking: 12 (12.5, 13.5, 14) inches
Sleeve length before blocking: 10 (11, 11.75, 12) inches
Abbreviations / Stitches Used
st = stitch ch = chain hdc = half double crochet slst = slip stitch rep = repeat rem = remaining pat = pattern ea = each sk = skip sp = space pm = place marker sc = single crochet Blo = back loop only
Notes:
- The pattern is written in US TERMINOLOGY.
- Repeat instructions after the asterisk sign: *, as stated.
- Part of the pattern is written in shorthand. For example, when you see a *slst-blo, hdc-blo*, you will place a slip stitch back loop only in one stitch, then a half double crochet in the back loop of the next stitch. Then you repeat the same pattern through the row.
- Ch 1 at the beginning of a new row does not count as a stitch.
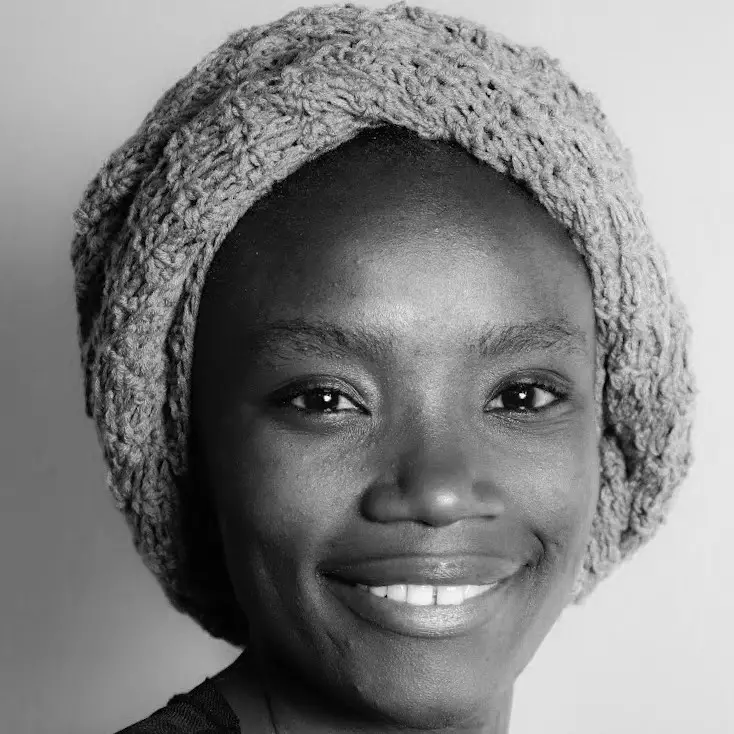
- The photos used are for medium size.
- The model has a bust size of 36” and wears medium size.

Crochet Sweater Scarf Pattern Instructions.
Rectangle body wrap.
Chain 294 (302, 310, 322)
Row 1. {working in the back bumps of foundation chains}
Sk 1 ch, *slst in next ch, hdc in next ch. Rep pat from * until only 1 ch remains, sc in the last ch. turn
Row 2.
Ch 1, *slst-blo, hdc-blo. Rep from * to the last st, sc in the last st going through both loops. turn
Repeat row 2 until you have 64 (66, 70, 74) rows. If you want it to have more torso coverage, add more rows.
Don’t cut yarn.
Adding sleeves.
Base row
Ch 1, then turn to the shorter side of the rectangle, place sc at the end of each row.
[your stitch count should be the same number as your body rows]
Ribbing.
Chain 57 (61, 65, 69)
Row 1.{working in the back bumps of the chains}
Sk 1 ch, slst in each ch to base row sts,[when you have 56 (60, 64, 69) sts] sl in the first 2 sts of the base row & turn
Row 2.
Skip the 2 slst in the base row, then slst in the blo of ea st to end of row, slst through both loops in the last st & turn.
Row 3.
Ch 1, slst blo in each st to base row, slst in the next 2 sts of the base row & turn.
Row 4.
Skip the 2 slst in the base row, then slst in the blo of ea st to end of row, slst through both loops in the last st & turn.
Rep row 3 & row 4, to the end of base row sts. Your work should end on row 4 pattern. Ch 1 & cut yarn, leaving a long tail [slightly longer than twice the sleeve length] to join the sleeve together.
Joining the sleeve.
Using the long tail, fold your work on the right side [last row] then join the sleeve from the cuff to approximately 2” in the body sts, using matress stitch joinig method.
Opposite Sleeve.
Base row
Working on the right side, attach yarn on the first stitch, then sc across. [your stitch count should be the same number as your body rows]
Repeat the instructions as of the first sleeve, from ribbing all the way to joining the sleeve.
Once complete, weave in your ends and enjoy wearing your sweater scarf.
Pin this pattern here


Leave a Reply