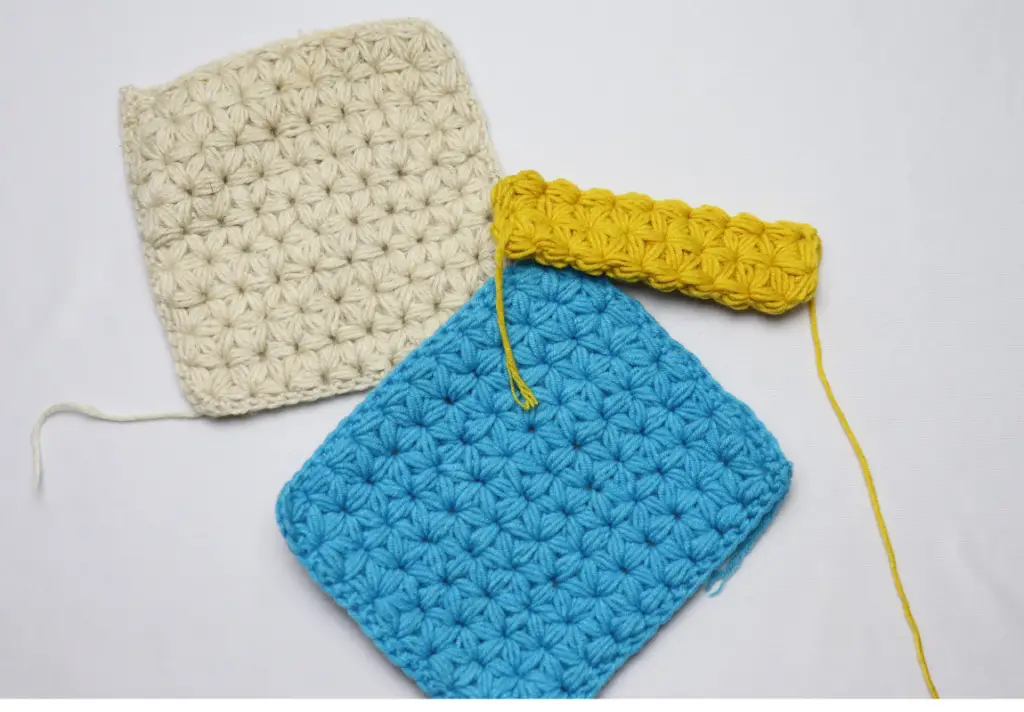
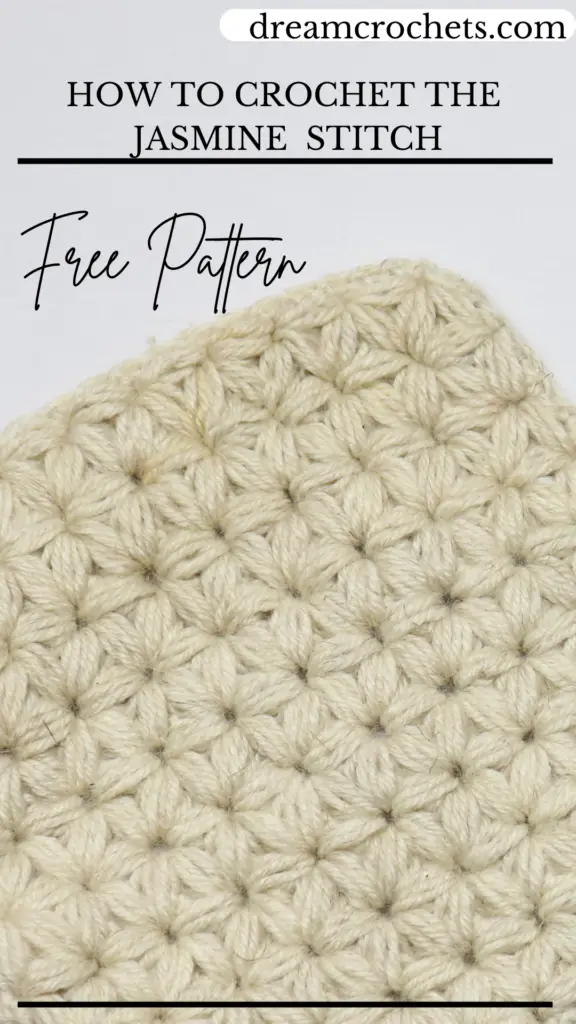
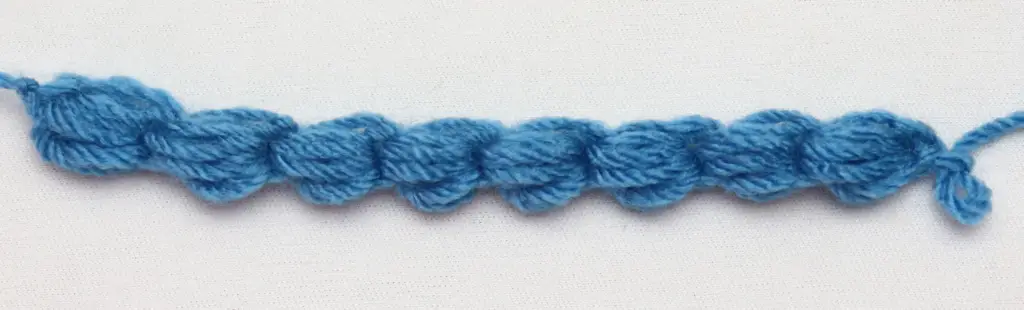
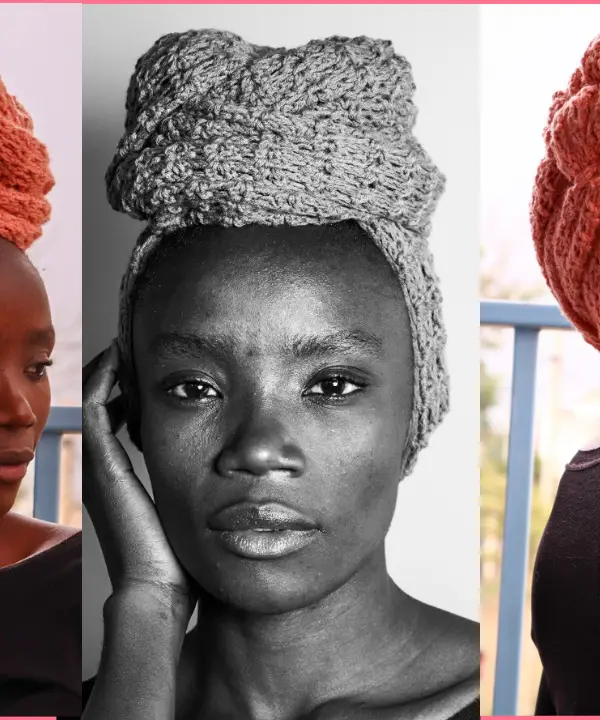
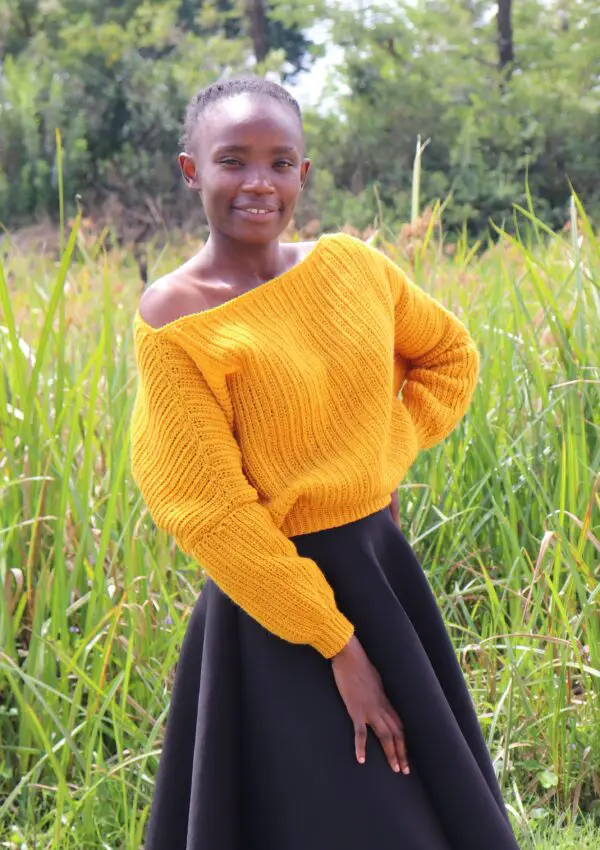
The Jasmine Stitch is a stunning and delicate crochet stitch that creates a beautiful, textured fabric resembling jasmine flowers. This elegant stitch is perfect for making scarves, blankets, shawls, or even intricate home décor projects like throw pillows.
Though it may seem complex at first glance, mastering the Jasmine Stitch is achievable with practice and patience. In this guide, we’ll walk you through everything you need to know about this stitch, including tips, tricks, and a step-by-step tutorial.
If you love to challenge your crochet skills every now and then, learning new stitches should be fun. I personally enjoy exploring different techniques, learning new stitches and designing fun patterns. You can find more stitch patterns here.
The crochet Jasmine stitch is such a textured and dense stitch. This means it will eat more yarn that other stitches. You therefore need to have this in mind if you’re planning to make a bigger project.
What Makes the Jasmine Stitch Unique?
The Jasmine Stitch stands out due to its 3D floral-like clusters, which give the finished piece a luxurious and intricate look. Unlike traditional crochet stitches, it utilizes a combination of puff stitches and linked loops to create a starburst effect. While this stitch requires a good understanding of tension control and yarn manipulation, the results are well worth the effort.
Materials Needed
Before starting, make sure you have the following materials:
- Yarn: A soft, pliable yarn works best for this stitch. Consider using cotton or acrylic yarn for a defined texture. I used classic dk for the tutorial.
- Hook: A slightly larger hook than what is recommended for your yarn weight helps achieve the puffy effect.
- Scissors: For cutting the yarn when finishing your project.
- Tapestry Needle: Useful for weaving in ends neatly.
Stitches and abbreviations
ch = chain
sc = single crochet
Puff Stitch ; {a}start by pulling a long loop, about half an inch, {b} then insert hook in the specified stitch or chain, yarn over and pull up a loop. repeat step {b} until you have 7 loops on hook. hold the working yarn at the base of the loops, then yarn over and pull through all the 7 loops carefully, insert hook in the loop that was held at the base of the 7 loops, and finish with a single crochet.
Notes:
- The pattern is written in US Terms,
- The stitch starts with foundation puff stitches and not foundation chains.
- Before starting a puff stitch, pull up a long loop, about half an inch, then maintain the length of loop all through.
How to Crochet the Jasmine Stitch
Step 1: Creating the First Puff Stitch
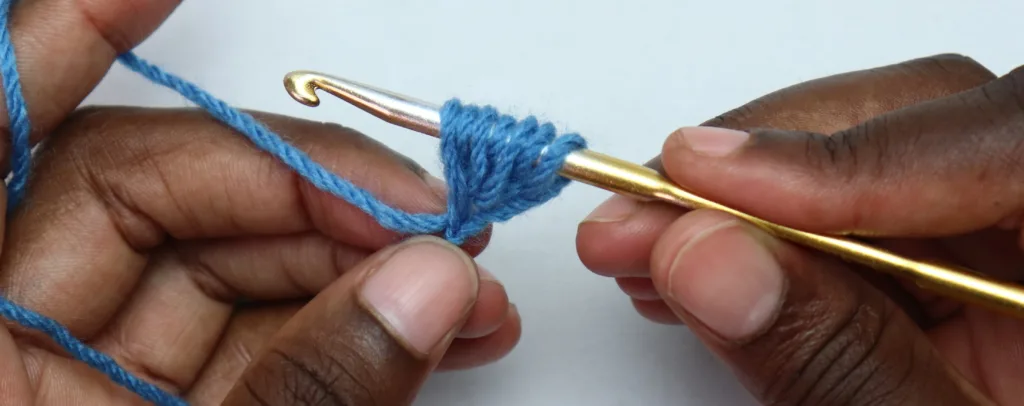
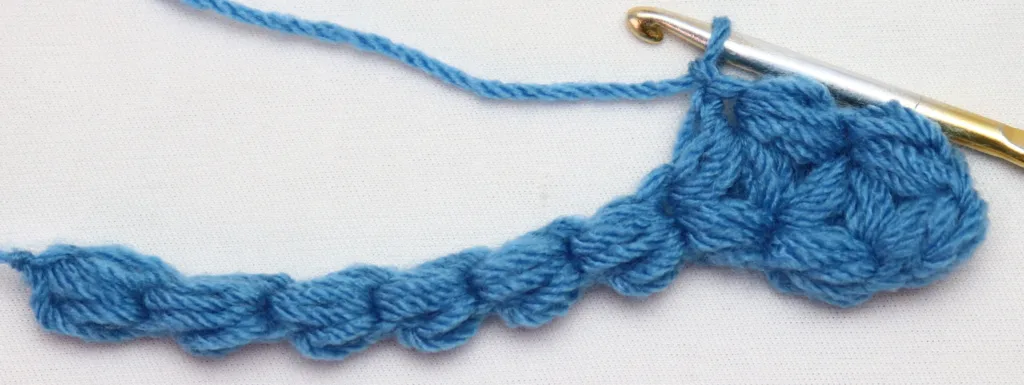
- Start with a slip knot and chain 2.
- Yarn over and pull up a long loop (about half an inch), then yarn over and insert hook in the first chain, yarn over and pull up a loop.

- Repeat the yarn over and pull up a loop in the first chain two more times (you should have 7 loops on your hook).
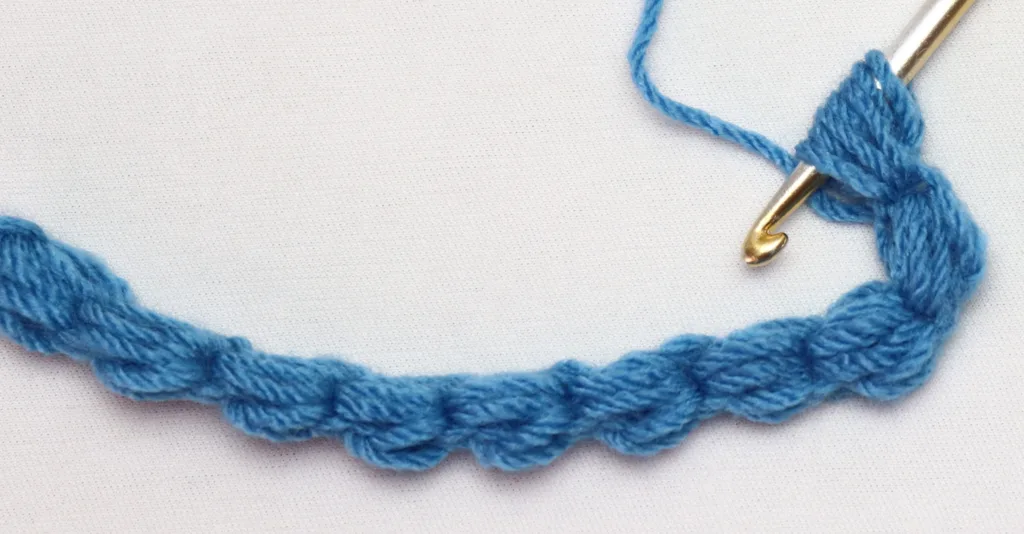
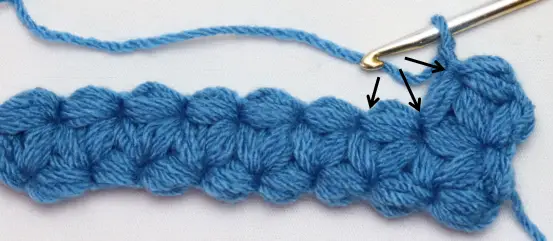
- while holding the main yarn on your left fingers {see first & second images below}, Carefully yarn over and pull through all loops {third image}, then insert hook in the loop that was held on your left fingers, yarn over and pull up a loop.
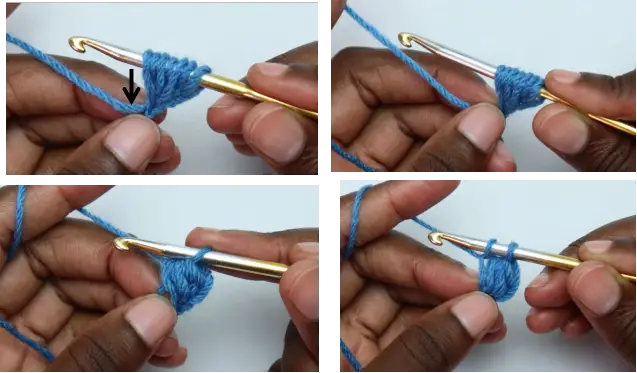
- yarn over and pull through the 2 loops on hook to close it then chain 1.

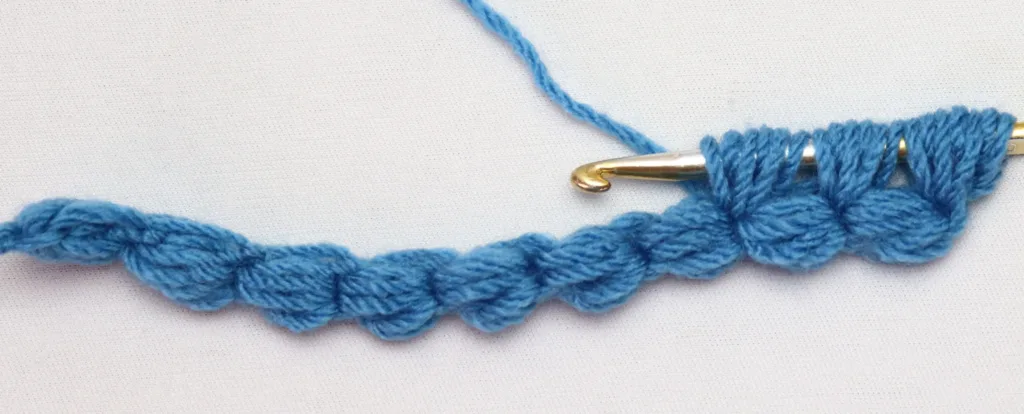
Step 2: Linking Puff Stitches
- Insert the hook into the stitch that secured the first puff. right below the chain stitch, yarn over and pull up a loop.
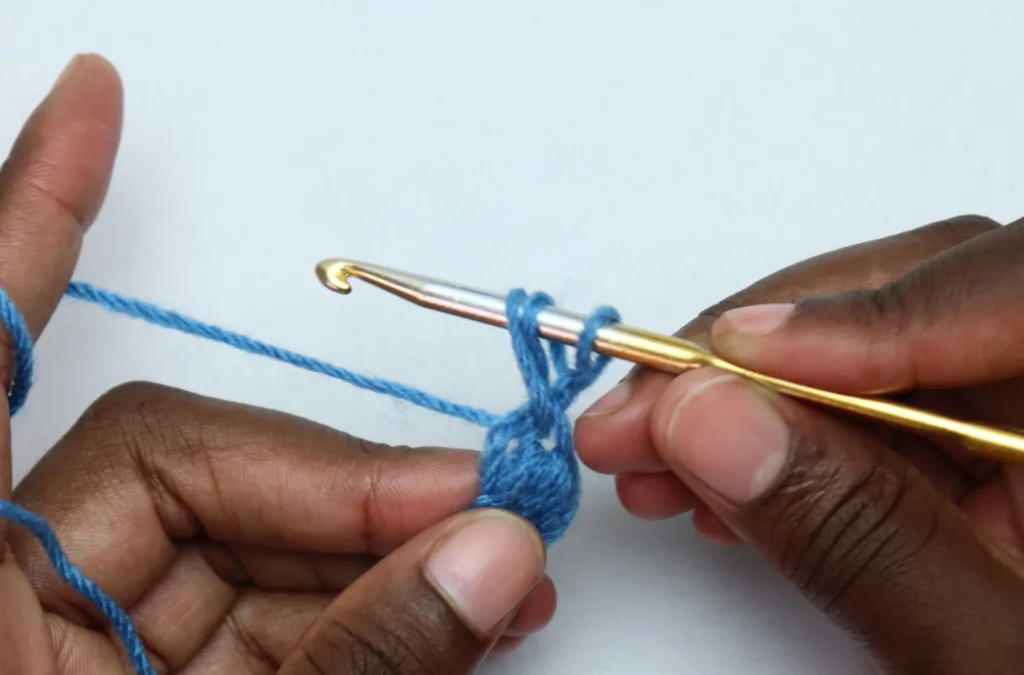
- Yarn over and Pull up a loop 2 more times in the same stitch, or until you have 7 loops on your hook.
- while holding the main yarn at the base of your current puff stitch, {Carefully yarn over and pull through all loops, then insert hook in the loop that was held , yarn over and pull up a loop, then yarn over and pull through the last 2 loops and chain 1.
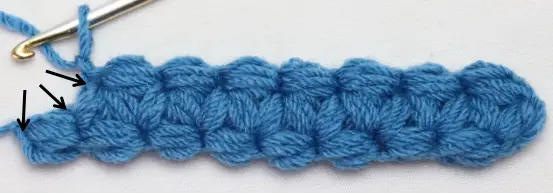
- Continue linking puffs together to form the first row.
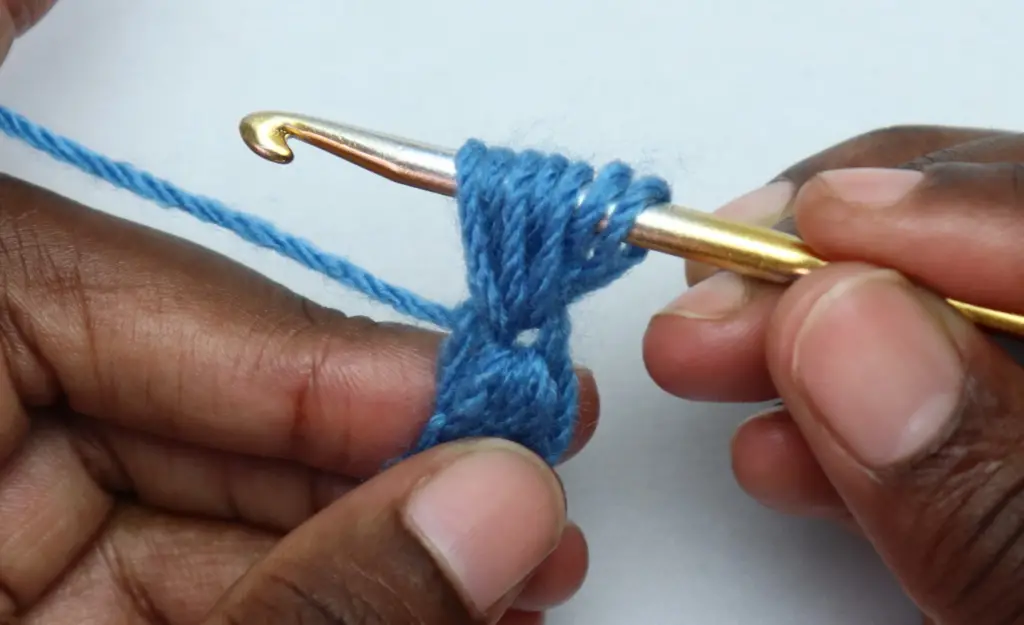
by repeating step 2, continue linking the puff stitches together until your get the length of your project. For a pattern stitch, you can continue until you have 7 puff stitches.
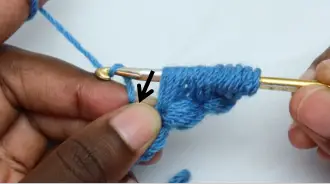
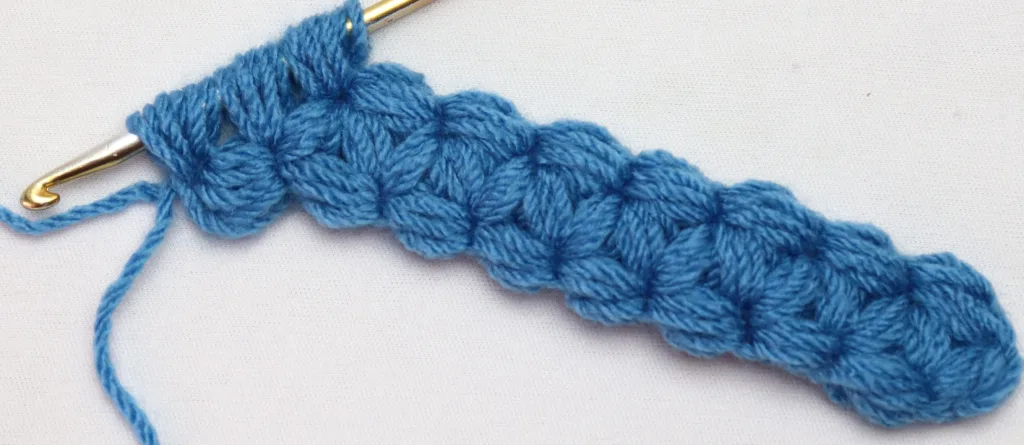
Step 3: First Jasmine flower on row 2.
- Start the next row by adding 1 puff stitch {rep step 2 above}, to create a turning puff stitch.
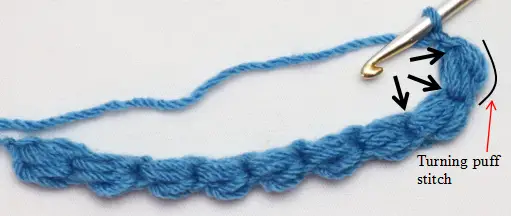
- from here on, we are going to create the jasmine flower by creating puff stitches in 3 spaces/stitches shown in arrows above. that is: {a}in the stitch below the chain stitch(of the very last puff ){b} in the stitch at the base of the last puff and {c} in the next space.
- In the first space[below the chain 1] yarn over and pull up 7 loops,
- then in the next space, you want to insert hook, yarn over and pull up 6 loops, [below the turning puff stitch]
- Repeat the previous step in the next space [at the base of the next puff stitch] you should have 19 loops on your hook
- hold the working yarn at the base of the loops, then yarn over and carefully pull through all the loops.
- insert hook in the loop that was created by holding the working yarn, yarn over and pull through the loop, then yarn over and pull through the last 2 loops. chain 1.
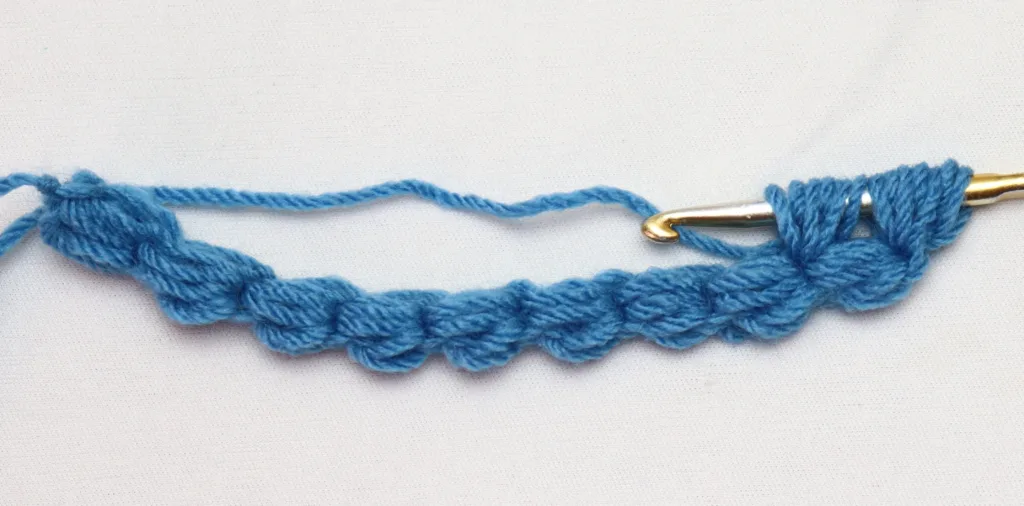
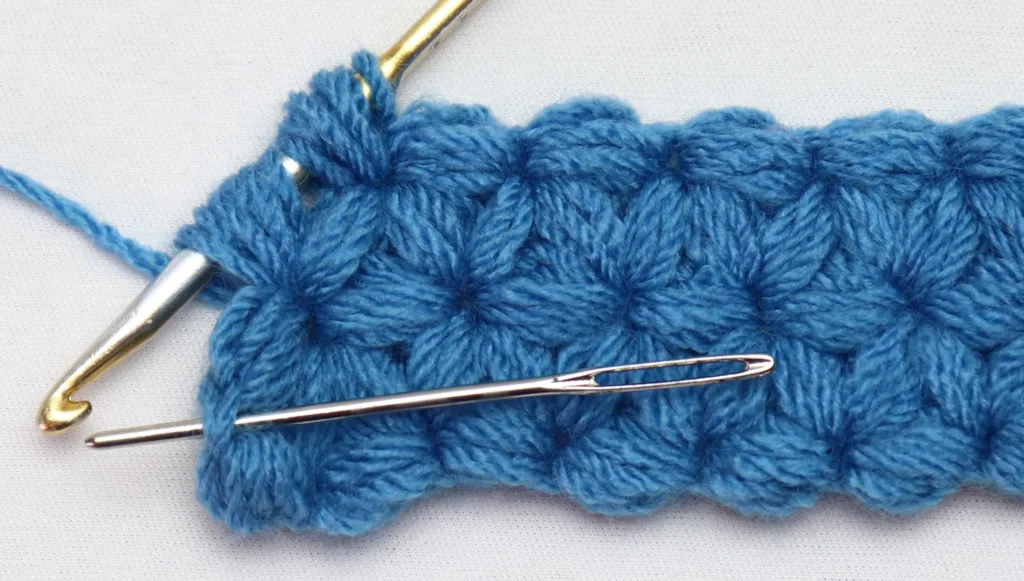
- pull up a loop, {insert hook in the stitch below the chain, (this is the top of 3 puff stitch together) yarn over and pull up a loop}, repeat pattern in {} until you have 7 loops on hook, then in the next space, pull up 6 loops, pull up 6 loops also in the third space [refer to image below]
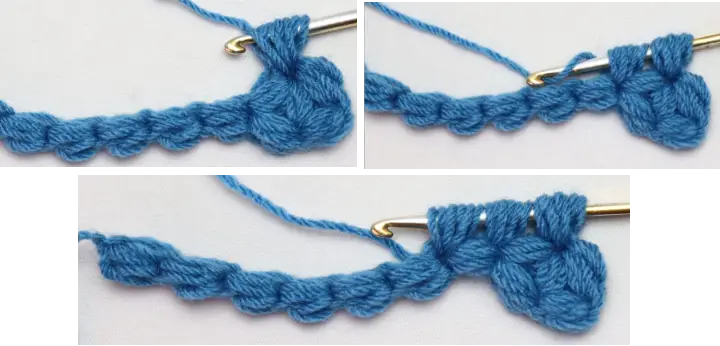
- hold the working yarn at the base of the loops, then yarn over and carefully pull through all the loops. insert hook in the loop that was created by holding the working yarn, yarn over and pull through the loop, then yarn over and pull through the last 2 loops. chain 1.
- Repeat the last 2 steps until only 1 puff stitch remains.
- continue with the puff stitch pattern by pulling up 7 loops in the first space, then 6 loops in the next space. pull up the last 6 loops in the chain space that you started with in row 1.
- hold the working yarn then yarn over and carefully pull through all the 19 loops. Finish with a single crochet in the loop held before pulling through all the loops. chain 1.
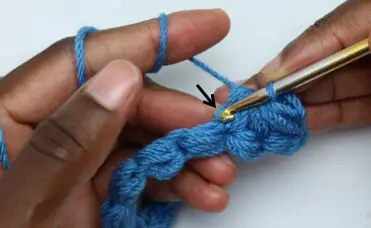
Step 4. Row 3.
- Make the turning puff stitch.
- create 3 puff stitch together by pulling up 7 loops in the first stitch {above the turning puff stitch} the 6 loops in each of the next 2 stitches{below the turning chain and the next puff below}.
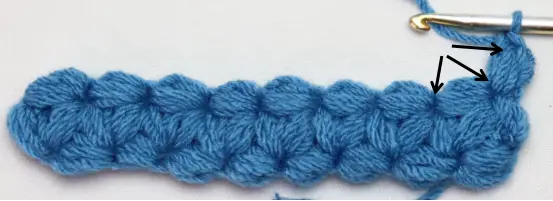
- hold the working yarn, then Yarn over and pull through all the 19 loops. sc in loop help then chain 1.
- continue with the 3 puff stitches together pattern [in the stitch above the stitch you just worked, in the stitch below the stitch and in the next stitch] as shown with arrows in the above picture, Until only 1 puff stitch remain.
- continue with the puff stitch pattern by pulling up 7 loops in the first space, then 6 loops in the next space. pull up the last 6 loops in the turning puff stitch of previous row.

hold working yarn, then yarn over and pull through all the 19 loops, single crochet in the help loop, then chain 1 and turn.
Continue with the pattern, repeating the row 3 instructions until you finish your project.

Tips for Perfecting the Jasmine Stitch
- Maintain Even Tension: Since this stitch involves pulling up long loops, consistency in tension is key to achieving uniform stitches.
- Use a Larger Hook: A bigger hook helps make the stitches airy and soft rather than too tight.
- Practice the Puff Stitch First: If you’re new to puff stitches, practice them separately before attempting the Jasmine Stitch, or a project using the jasmine stitch.
- Work Slowly: Unlike basic stitches, the Jasmine Stitch requires precision. Take your time to ensure clean and symmetrical motifs.
- Block Your Work: To enhance the stitch definition, consider wet-blocking your finished project.
What Can You Make with the Jasmine Stitch?
This stitch is highly versatile and can be used for various projects, including:
- Scarves and Shawls: The soft, lacy look makes for elegant wearables.
- Blankets: A Jasmine Stitch blanket looks luxurious and cozy.
- Pillows and Cushion Covers: Adds a decorative element to your home.
- Baby Items: Soft and textured enough for baby blankets or clothing.
Happy crocheting!
Follow along with the video tutorial.


Leave a Reply