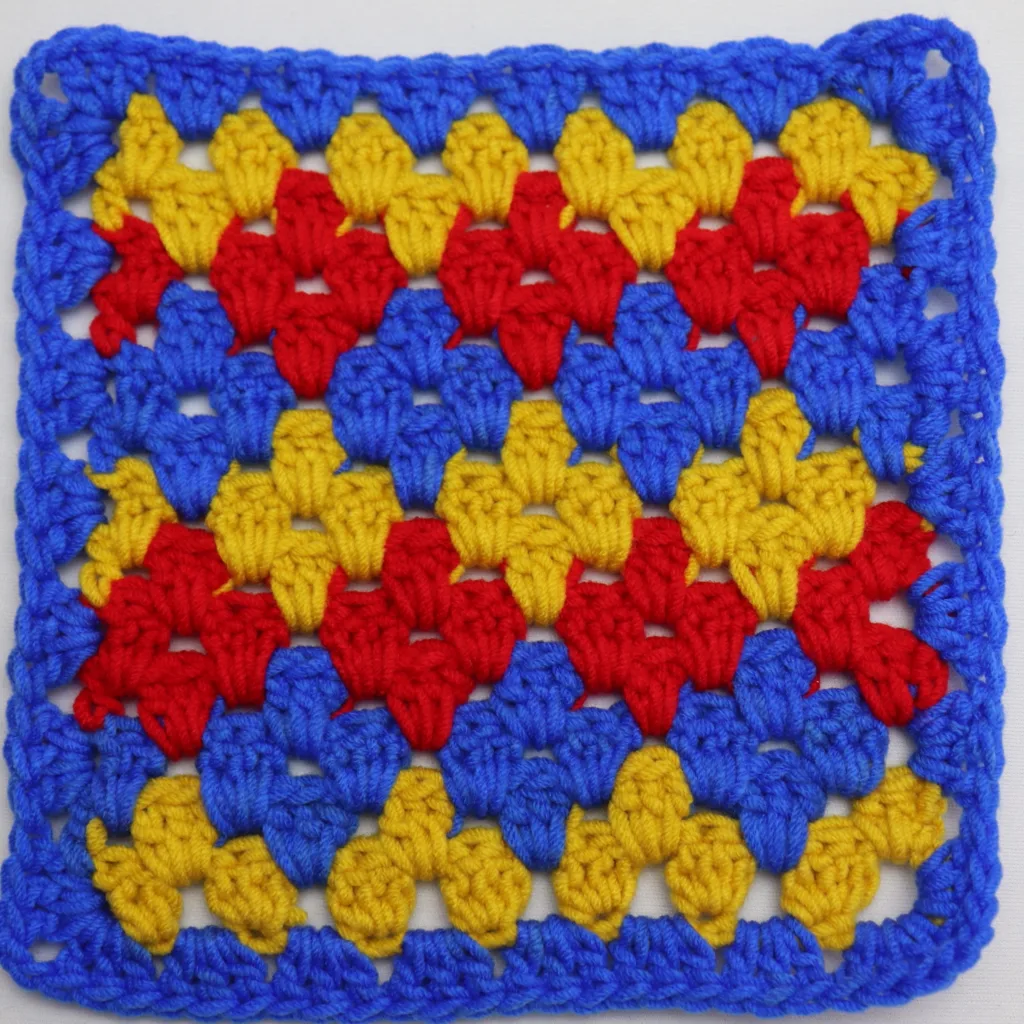
If you want to scale up your granny stitches, then this diamond granny stitch must be in your “stitches to learn” list. It uses two or more colors of yarn to give a beautiful and colorful fabric.
At first, it seems so hard but with only 4 rows to repeat, this diamond stitch pattern works seamlessly. You however need to have the basic knowledge on how to crochet the granny stitch in rows.
The diamond granny stitch is so versatile, and can be used in making blankets, cowls, showls, sweaters, cardigans just to name a few.
Find more stitch patterns here.
Do you like to follow along with a video tutorial ? check it our here.
Skill Level: Advanced beginner.

Materials Needed.
- Yarn. You can use any yarn that you have around in 2 or more colors.
- Crochet hook. Use the recommended hook size, to the yarn you are using.
- Pair of scissors.
Stitches & Abbreviations.
ch = chain
Dc = double crochet
Sc = single crochet
Special Stitches:
Cluster; this is 3 double crochet stitches, placed in a single space.
Notes.
- This pattern uses US Terms.
- Chain 3 at the beginning of a new row, counts as a double crochet stitch.
- When changing colors in a row, always work on the color not being used at a time, this carries it to the next space.
- Repeat rows is row 2 to row 5.
Crochet Diamond Granny Stitch Pattern.
Start by chaining a multiple of 3 sts plus 1, with first color.
I started with 22 chains for this tutorial.

Row 1
Skip 3 chains{first dc st}, 2 dc in the next chain,
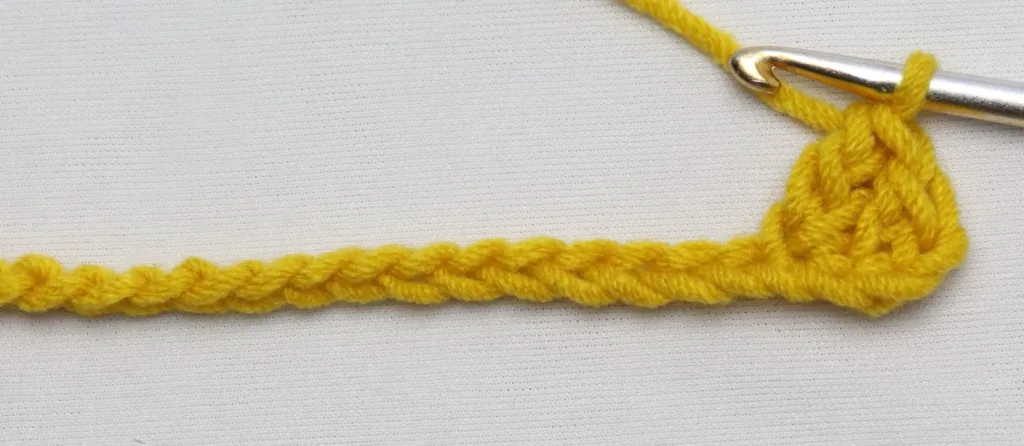
skip 2 chains, 3 dc in the next chain,

repeat previous step until 3 chains rem,

skip 2 chains, dc in the last chain.

Row 2.
Still with first color, chain 3

2 dc in the first space, but stop when you have 2 loops on hook, when working the 2nd dc,

pick 2nd color, yarn over and pull through the last 2 loops ,
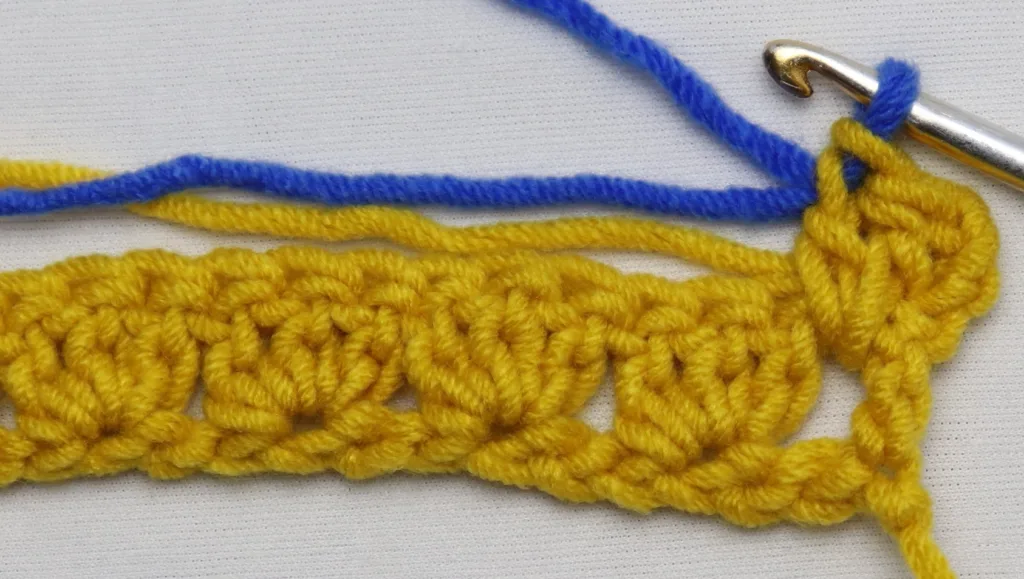
working over the previous color, 3 dc in the next space, and stop when you have 2 loops on hook, when working the 3rd dc,
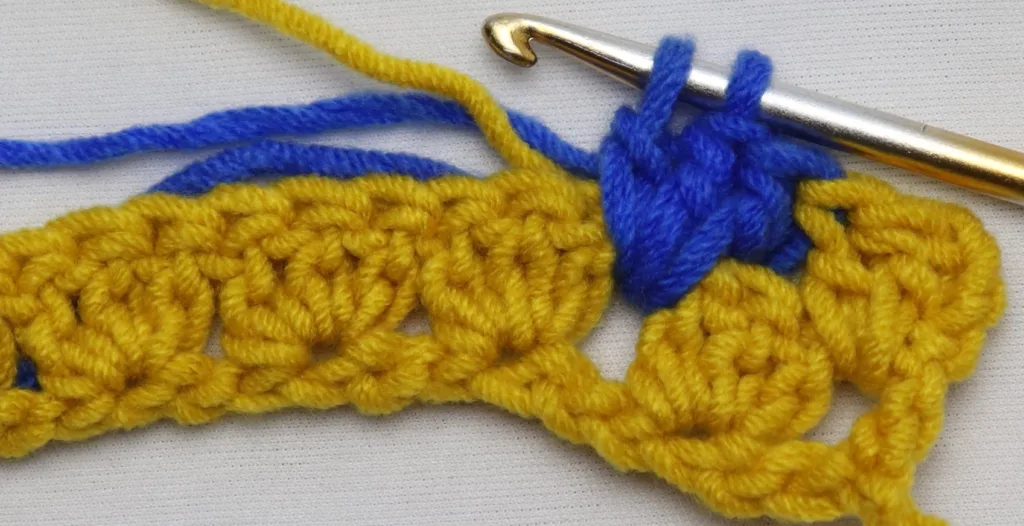
pick the first color, yarn over and pull it through the last 2 loops.
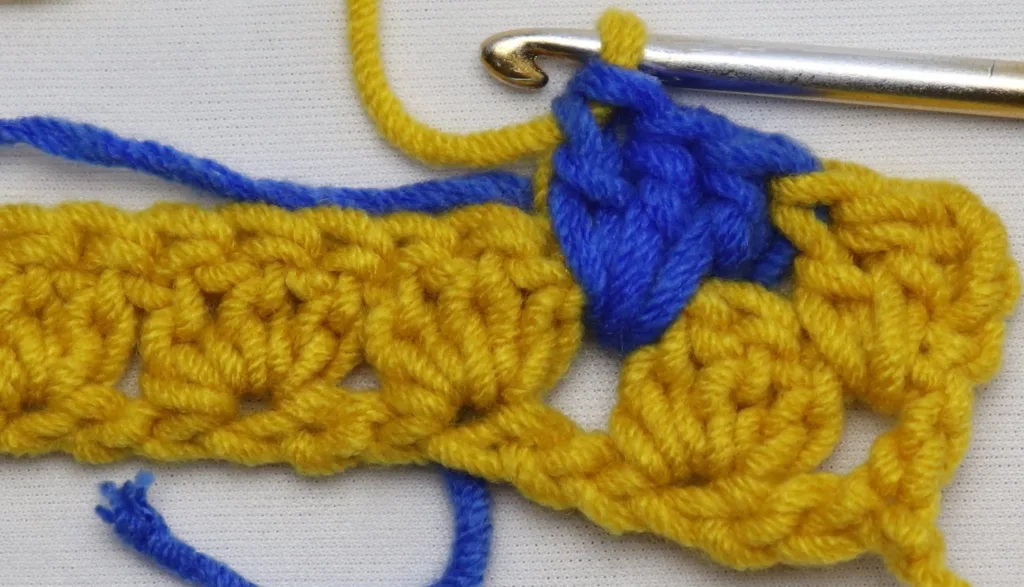
working over 2nd color, 3 dc in next space, then change color to the 2nd color, in the 3rd dc stitch,
Continue placing 3 dc in each space, changing color on the last dc stitch of every 3 dc cluster, and working over the yarn not being used, until you reach the end,

After changing to 2nd color in the previous cluster, go ahead and place a dc in the last stitch. Turn.

You can cut first color yarn.
Row 3.
With 2nd color, Chain 3, then place 2 dc in the next space, working over the yarn that was carried on previous row.

3 dc in each space, until you have the last cluster remaining, ensure that you work over the yarn that was carried over in the previous row.
dc in the last stitch, and change to 3rd color on the last 2 loops of the dc stitch. Turn
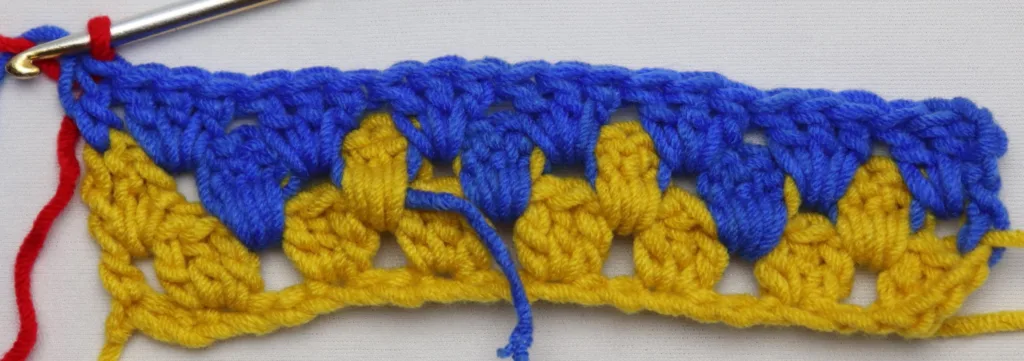
Row 4.
working over 2nd color, ch 3, 2 dc in the next space, stop when you have 2 loops remaining on the last dc,

change to 2nd color, and finish the dc stitch,
working over 3rd color, 3 dc in the next space, and change to 3rd color in the last dc stitch,

Continue with the row pattern, changing color on the 3rd stitch of every cluster and working over the inactive yarn, until you reach the end of row.
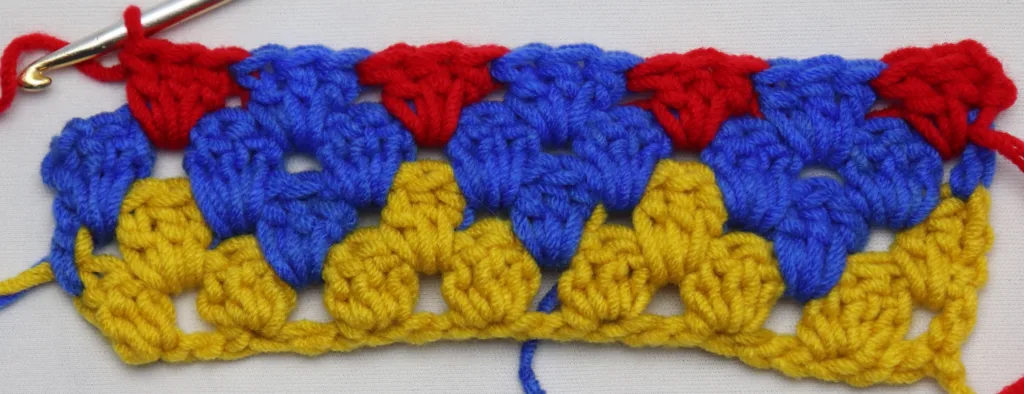
At the end of the 3 dc clusters, don’t change to 2nd color yarn, dc in the last stitch. Turn.
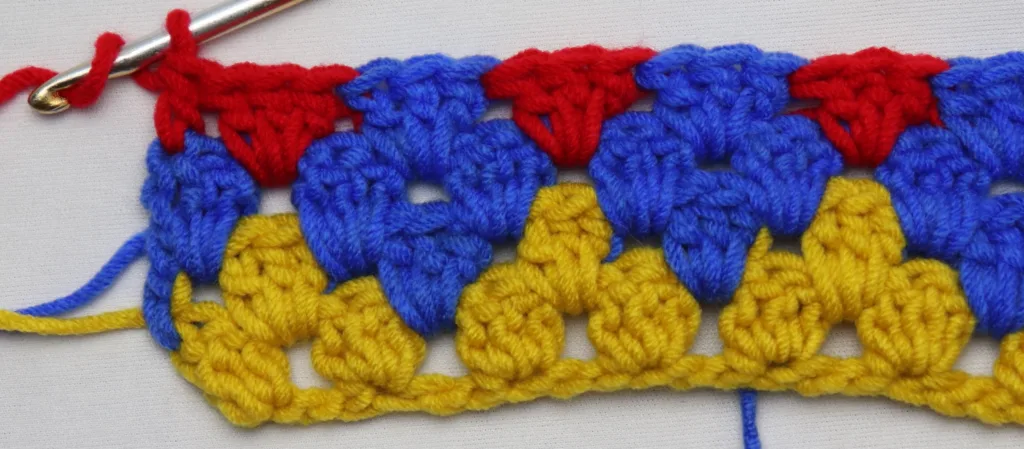
Row 5.
With third color, ch 3, 2 dc in next space,
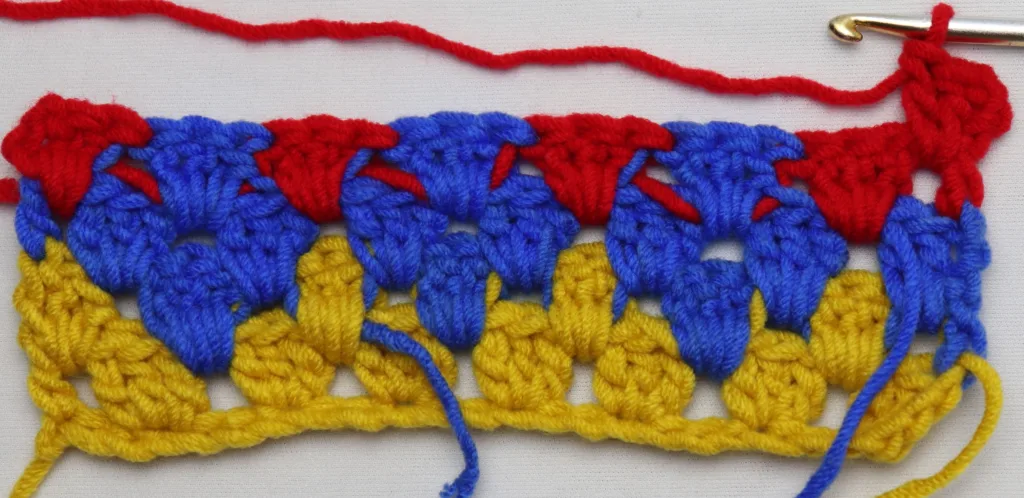
working over the yarn carried in previous row, 3 dc in each space to end of row,

dc in the last stitch, turn.
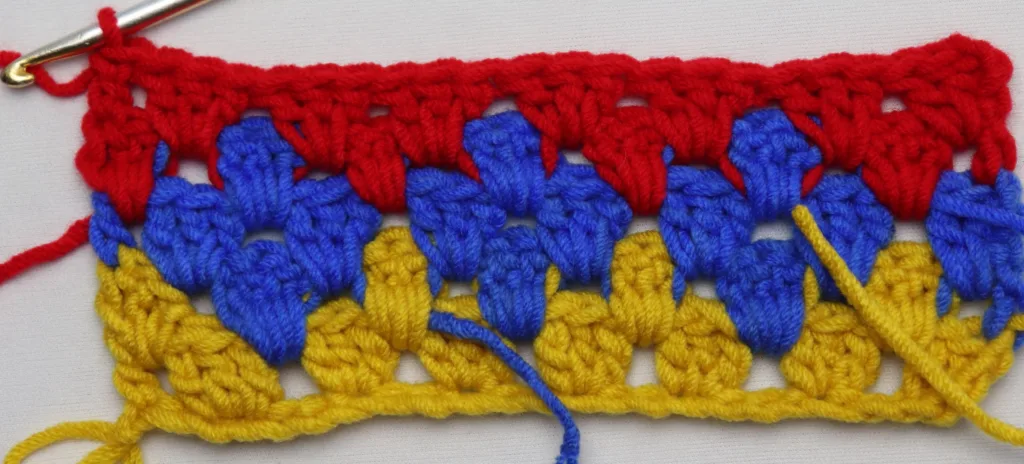
Repeat rows 2 to 5, until you achieve your desired size of your project,
Adding border.
Single crochet border:
- Attach yarn on any st, single crochet in each stitch across, then ch 1 at the end of row and turn to the next side.
- Place 2 sc around each dc stitch, to the end of row. ch 1 & turn to bottom row.
- sc in each stitch across, ch 1 & turn to next side.
- Place 2 sc around each dc stitch, to the end of row. ch 1 & join it to the first sc stitch.
Save it on pinterest so you can always come back and work on it
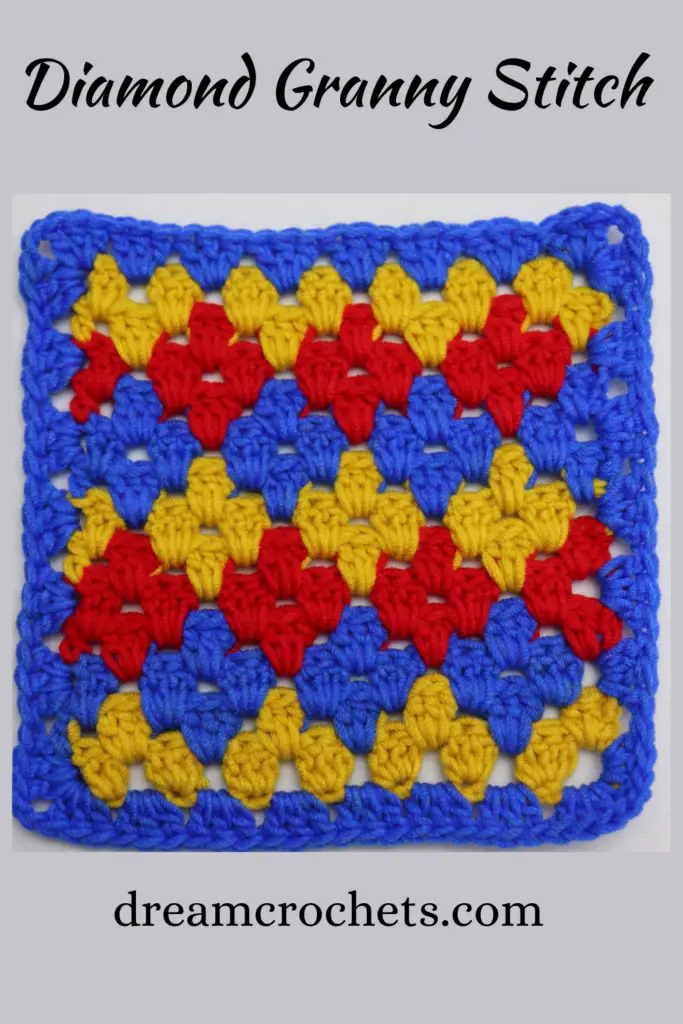
Granny Stitch Border:
- Attach yarn around the last dc stitch (on the side), then place 3 dc around the same stitch.
- Skip the next dc stitch, 3 dc round the next stitch.
- Repeat previous step to last dc stitch.
- Turn to bottom row,
- 3 dc in the same space.
- skip the next cluster, 3 dc in the next space,
- Repeat previous step to end of bottom spaces,
- Turn to next side,
- 3 dc, ch 1, 3 dc around the next dc stitch,
- skip next dc stitch,
- 3dc around next dc stitch,
- repeat last step to end of rows.
- Around the last dc stitch, place 3 dc, ch 1, 3 dc,
- Turn to top row,
- 3 dc in each space to end,
- 3 dc, ch 1 in the same space as the first 3 dc,
- Then with slip stitch to close round.
This is the end of the diamond granny stitch pattern and I hope you enjoyed it. Please share with me what you make on the links below.
Instagram : https://www.instagram.com/dreamcrochets/
Facebook group : https://bit.ly/3XLcqNi
Pinterest https://www.pinterest.com/Dreamcrochets
Youtube http://bit.ly/3lJy07v
Facebook Page https://www.facebook.com/dreamcrochets
Want more stitch Patterns? Find them Here.
Buy me coffee to support these free content.
Remember, sharing is caring.


Leave a Reply